dotCMS's Universal Visual Editor (UVE) allows full in-context editing for headless websites, single-page applications, and other remote apps designed to pull content from dotCMS. UVE can be configured to work with any external hosting service — including Vercel, AWS Amplify, etc.

The UVE allows the use of the same Page Editor tools on a remote site or app as one might use on a native dotCMS page.
This feature both simplifies and improves upon its predecessor, Edit Mode Anywhere. It features fewer technical requirements and a more natural, library-based integration through dotCMS's new JavaScript SDK.
Configuration

To begin setting up the Universal Visual Editor, first browse to Settings -> Apps. Select the built-in integration for EMA - Edit Mode Anywhere Next (note: soon to be renamed “Universal Visual Editor”). Select the site that will be feeding the destination pages.
Under Configuration, add a JSON object with the property config, whose value is an array of JSON objects that specify the URLs and path patterns with which the UVE is intended to interact.

The example given on the App configuration menu illustrates this:
{
    "config":[
        {
            "pattern":"/blogs/(.*)",
            "url":"https://myspa.blogs.com:3000",
            "options": {
                "authenticationToken":"123",
                "depth":3,
                "X-CONTENT-APP":"dotCMS"
            }
        },
        {
            "pattern":".*",
            "url":"https://myspa.com:3000",
            "options":{
                "authenticationToken":"456",
                "depth":1,
                "X-CONTENT-APP":"dotCMS"
            }
        }
    ]
}
Each object in the array contains the following properties:
| Property | Description |
|---|---|
url | The URL of the website to interact with the UVE. |
pattern | A regular expression that specifies the site path pattern that will trigger the UVE. |
options | An object with the following properties:
|
The remote site will likewise require configuration by way of the JavaScript SDK's client library. Initializing the client requires the dotCMS URL, a dotCMS API token, the corresponding Site identifier, and any JavaScript Fetch API options to be passed. For more information, see the JavaScript SDK documentation.
Development
Once the remote client is able to interact with dotCMS, development can proceed according to the standards of your chosen framework or paradigm. The Javascript SDK makes available rendering libraries, such as its React library, to simplify API calls and component construction in different frameworks.
The UVE places no specific demands on syntax, style, or directory structure.
The most important data structures involved in developing a UVE-enabled headless app are the Page API and Navigation API JSON response objects. The Page API returns information about the basic properties of a Page, its containers and contentlets, template and layout, Site, and more; the Navigation API returns information on the current host, folder, and child/grandchild folders, depending upon the configured depth.
Using this data, you can freely design components to determine how content of each Content Type will be displayed. While the SDK's rendering libraries simplify the handling of this data, it is is also possible to operationalize it manually, through the client alone — or even devise your own libraries for frameworks not yet represented in the SDK.
Page Editing
Once UVE is configured, dotCMS Pages with paths matching the pattern defined in the App configuration will load through the proxy of the remote site inside the Page Editor. It nevertheless remains fully editable.
Under the hood, the UVE interface is distinct from the core dotCMS Edit Mode, at the time of writing. However, its UX behavior has been designed to closely match the original, allowing familiar patterns such as draggable items from a Content Palette, in-line editing of embedded contentlets, layout changes, and more. Eventually, the UVE is planned to replace the classic Edit Mode for native pages.
Demo Setup
To quickly begin using the UVE, you'll need two things:
- A dotCMS instance; if you need one, head over to our Current Releases page to generate a Docker Compose file and spin up a local container. (Be sure to check the box to include the Demo site.)
- If you're new to dotCMS, once your Docker container is running, see Logging Into dotCMS.
- One of our example projects, which can be found in our UVE example repository.
This section will focus on the NextJS example project.
Begin by cloning the repository.
From the root directory of the project, run the development server with one of the following commands:
npm run dev

yarn dev

pnmp dev
Open http://localhost:3000 in your browser to view the result.
Edit the page by browsing to
/src/app/[[...slug]]and editingpage.js, and then note the changes in the browser.- Optionally, you may wish to ensure the
siteIdlisted inpage.jsis correct. In the dotCMS admin panel, browse to Settings -> Sites, then click through to the active Site, open the History tab, and note the identifier.- This is not strictly necessary for demo purposes; if the
siteIdis blank or incorrect, it will fall through to the default Site.
- This is not strictly necessary for demo purposes; if the
- Optionally, you may wish to ensure the
Follow the instructions under the Configuration section to set up your App configuration.
- Ensure
urlis set tohttp://localhost:3000. For simplicity, you can setpatternto.*.
- Ensure
Rename the
.env.local.examplefile in the root of the project to.env.local, then edit the file:- Set
NEXT_PUBLIC_DOTCMS_HOSTto the url of your dotCMS site. If you've just spun up a new container, it's likely at http://localhost:8082 or http://localhost:8080. - Set
DOTCMS_AUTH_TOKENequal to a dotCMS API Token.
- Set
Browse the dotCMS admin panel to Site -> Pages. Open the Home page (
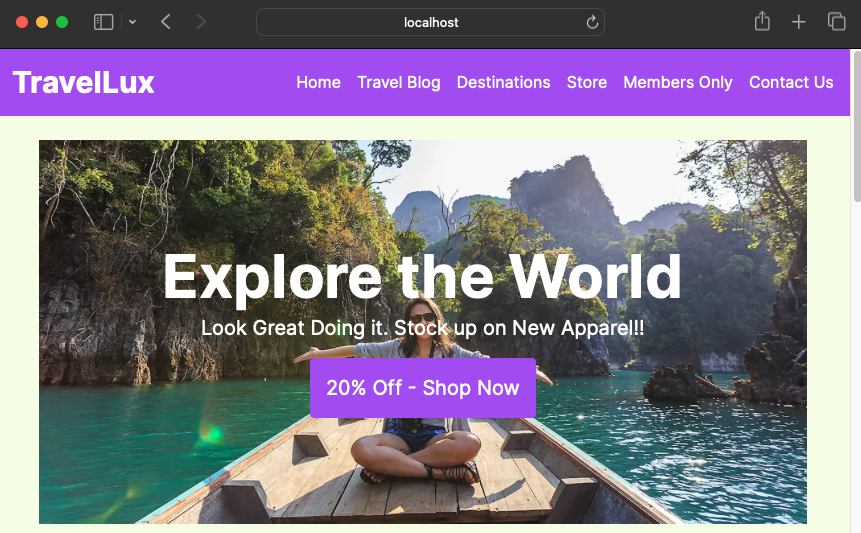
/index). You will now be editing through the proxy of the remote site.Make edits — for example, click the Pencil icon and edit the banner text, then save the changes.
Reload the remote site at http://localhost:3000, and note the changes reflected.
From there, make any further changes you please! As a self-study exercise, you may wish to begin by creating new components for Content Types not present in src/components/content-types, and then assigning contentlets of that type through the editor.
Demo Troubleshooting
Runtime Error
If the remote site throws a runtime error over image retrieval, it is possible that you may need to adjust the configured port to point to your dotCMS instance.

In the project root, open next.config.js, and confirm that the images property's remotePatterns array contains an object pointed to the correct hostname and port (usually 8080 or 8082).
You may wish to include several objects to cover multiple bases. For example:
const nextConfig = {
    images: {
        remotePatterns: [
            {
                protocol: 'http',
                hostname: 'localhost',
                port: '8080'
            },
            {
                protocol: 'http',
                hostname: 'localhost',
                port: '8082'
            }
        ]
    }
};
Remote Page Not Displaying in Page Editor
In certain cases, browser tools that aggressively block cross-site activity, such as Brave's built-in Shield, can interfere with UVE page editing. If your browser's network tools report that the call to the remote site failed with a reason such as (blocked: other), then try lowering those shields for the admin panel. This will likely restore the editor.